Adding Seline to your Framer site
Adding Seline to Framer is as easy as copying and pasting our script into your project's custom code settings. This only works with Framer's paid plans though.
<script src="https://cdn.seline.so/seline.js" data-token="PROJECT_TOKEN" async></script>
- Copy the code snippet provided above.
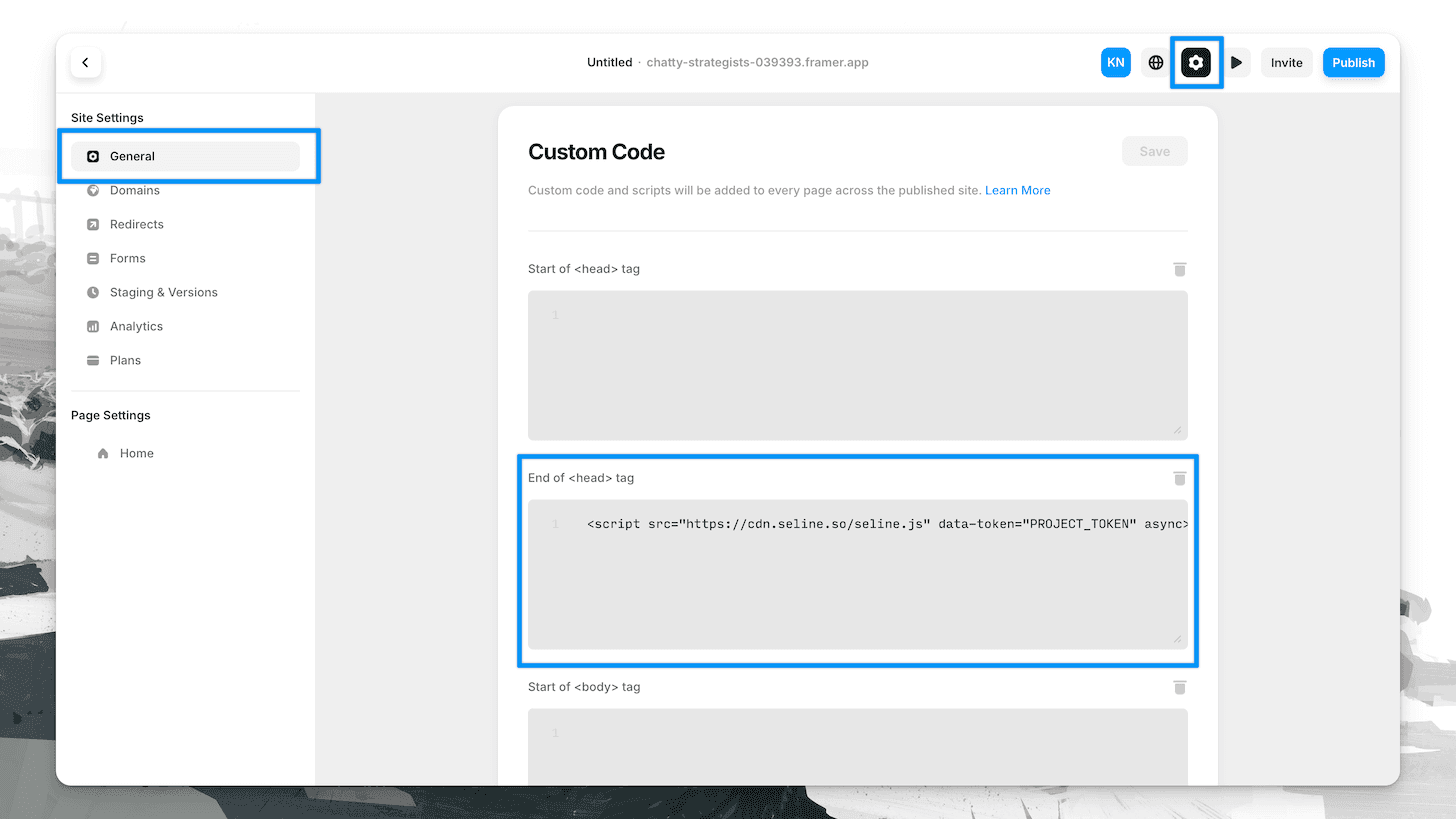
- Open your Framer project and navigate to Site Settings, then select General and scroll down to Custom Code.
- Paste the copied code into the Custom Code - End of <head> tag section.
- Update the data-token with your project token, which you can find in the general settings at Seline.
- Click save, and publish your project.
That's it! Now visit your website, click around a bit, and you should see the events appearing at your Seline dashboard.
Custom events
There are two ways you can track custom events with Seline at Framer.
If you know what you're doing and need some advanced tracking logic, such as tracking onScroll events or other custom events, you can use our seline.track('event name') function at the End of <body> tag section at your pages' settings.
But the simplest way to track buttons, inputs, forms, or other elements clicks is by using html data attributes. We suggest looking at our custom events documentation first to understand how it works.
You will need to create a pretty straightforward Code Override that adds the desired data-sln-event data attributes to your elements, like buttons or forms. You can read more about Framer's Code Overrides in their official documentation.
In the example below, we will add a data-sln-event="demo: clicked" attribute to a button element. But the same approach applies to any other element you want to track.
Creating a Code Override
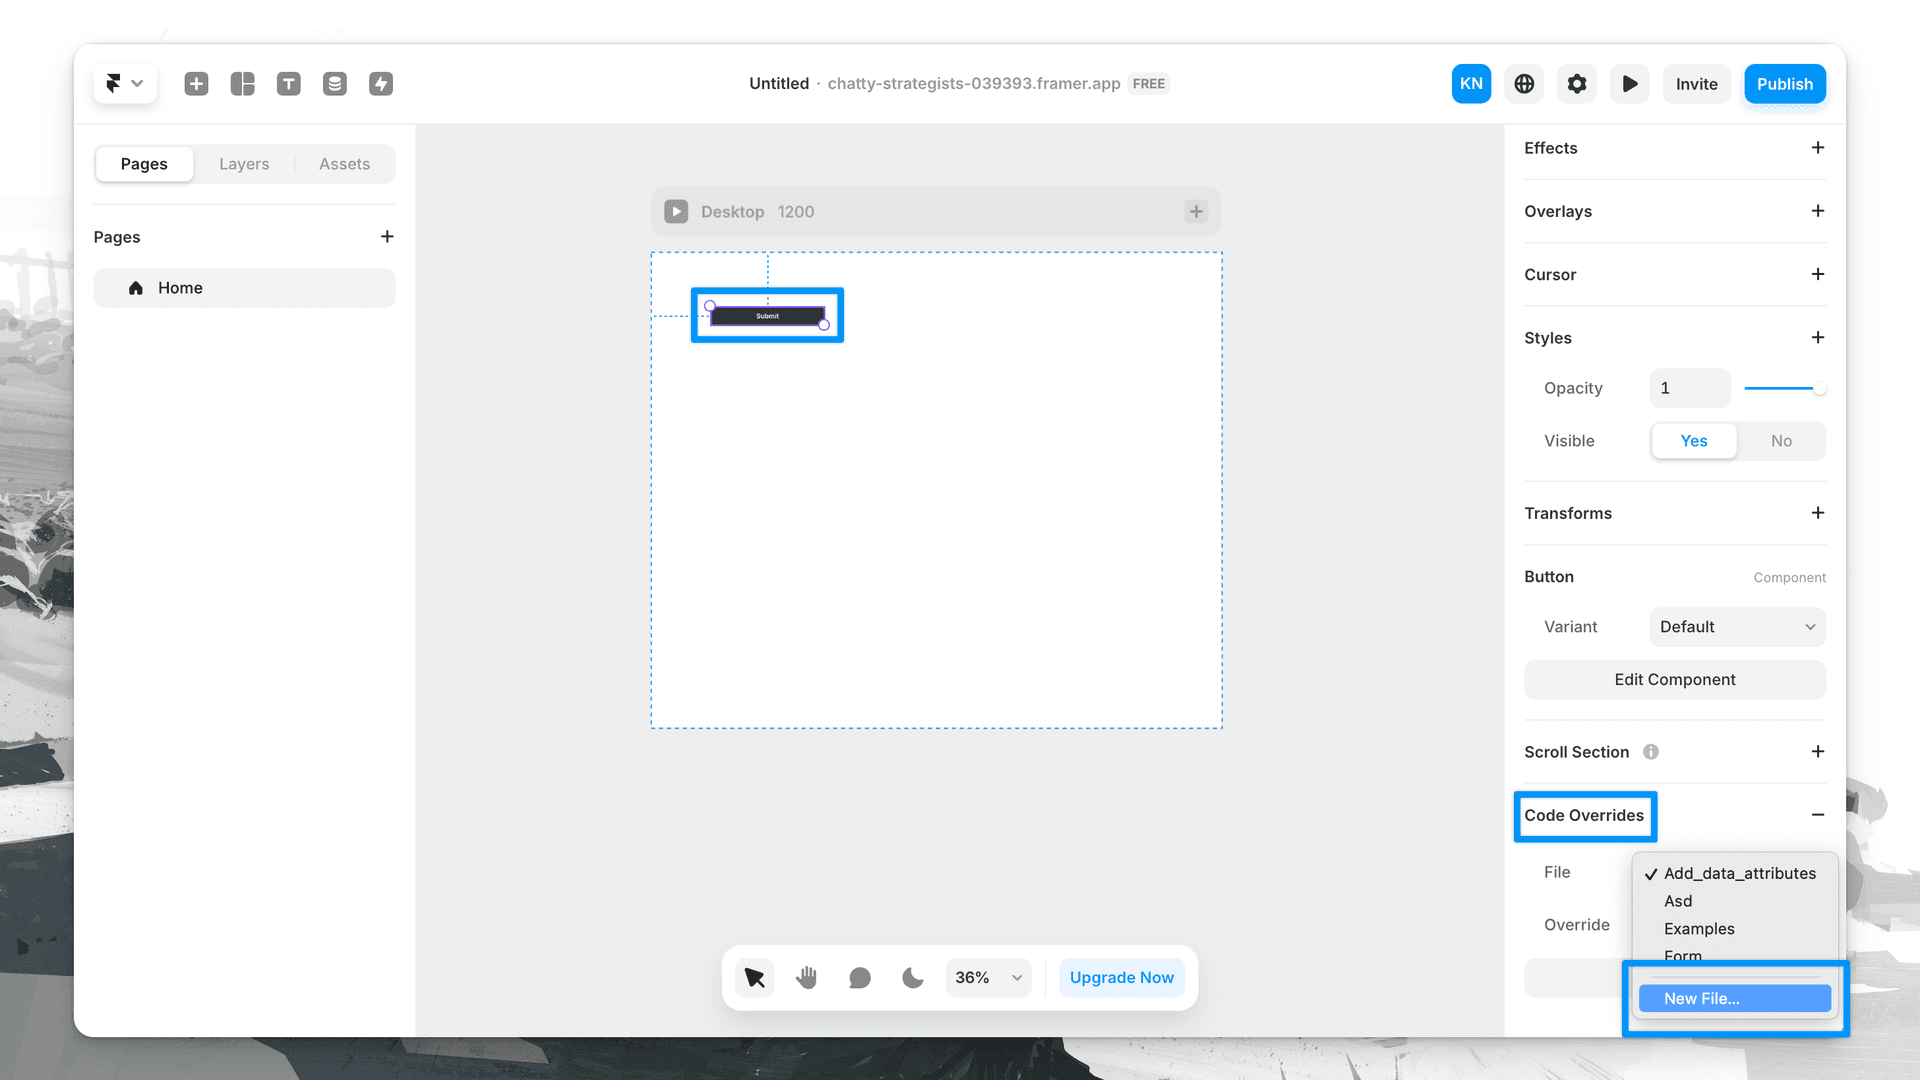
- Head to your Framer project and click on a button or any other element you wish to track.
-
Scroll down to Code Overrides at the right-side panel, then select File and New file....
-
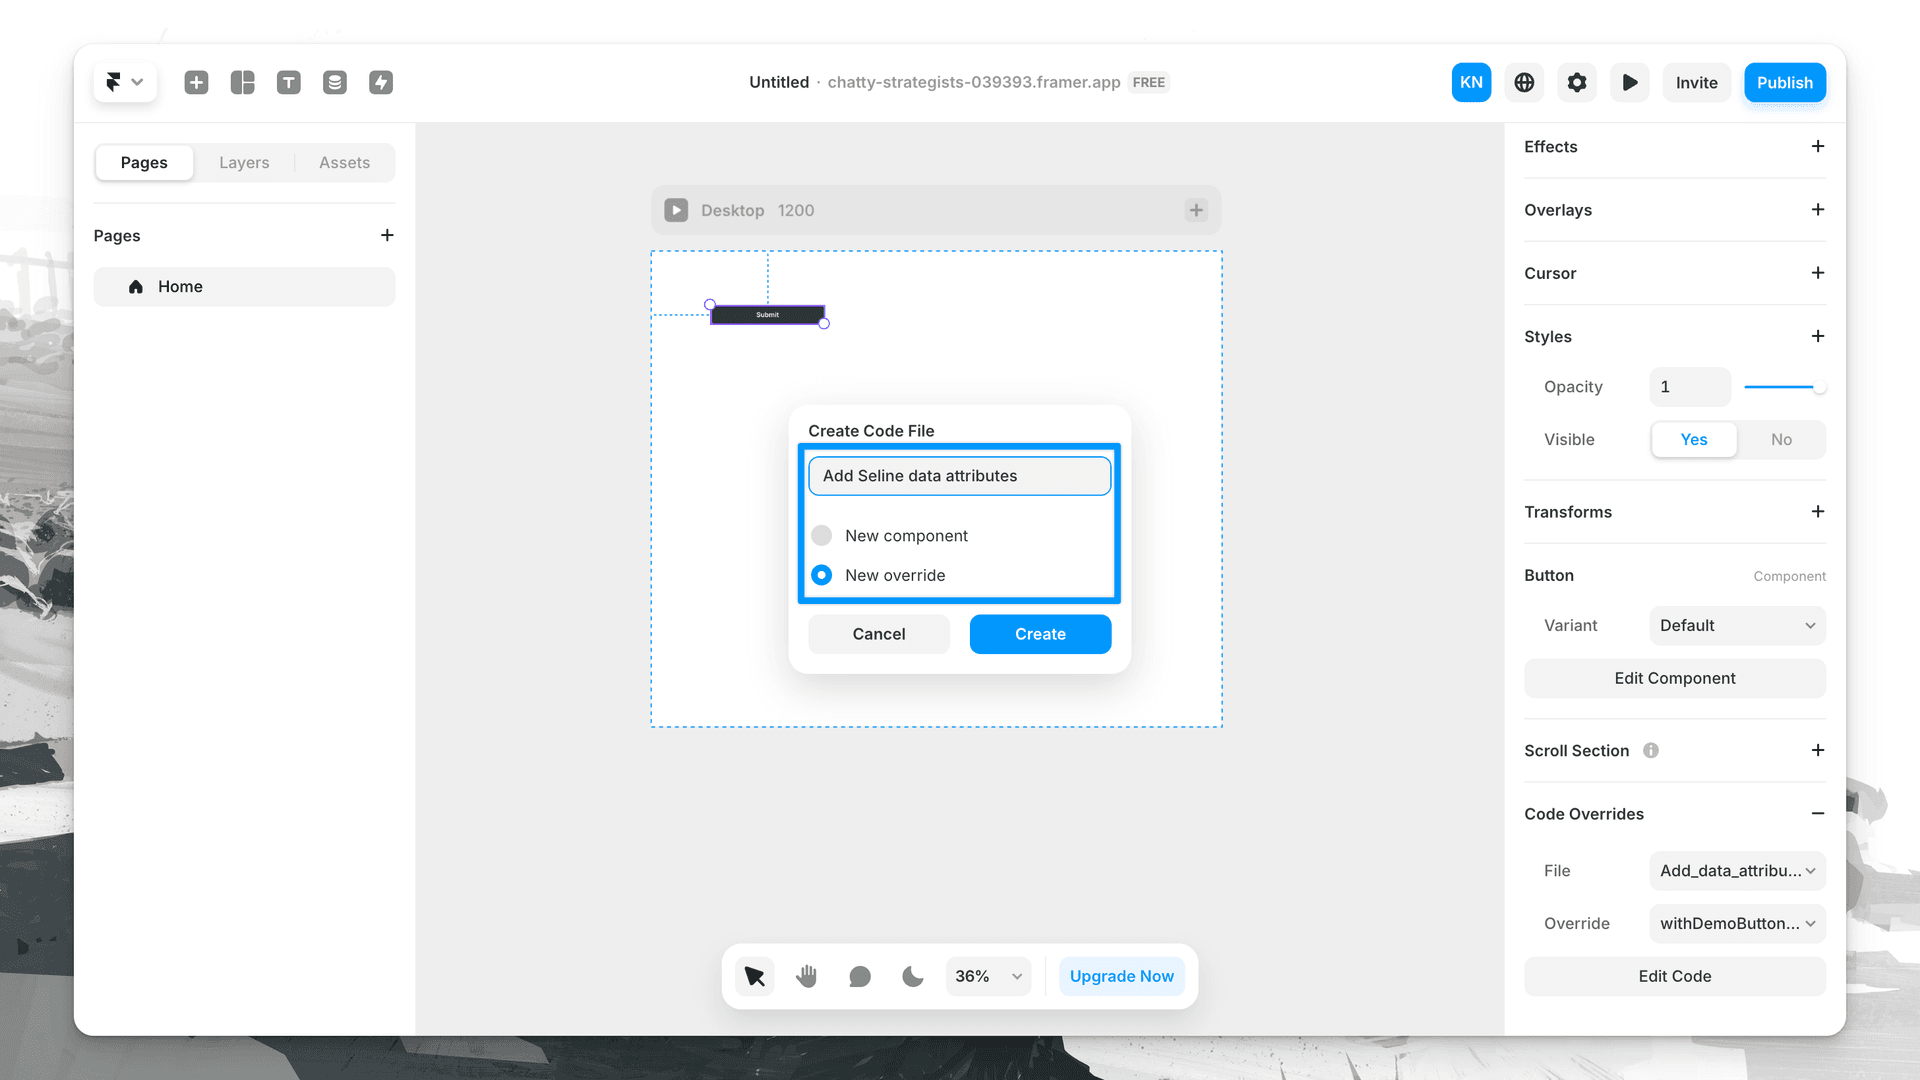
Name your file, such as Add Seline data attributes. Leave the New override selection, then click Create.
- You will then see the editor with some sample code. You can delete this code, and replace it with the following 2 example functions for Seline data-attributes:
import type { ComponentType } from "react"export function withDemoButtonAttrs(Component): ComponentType {return (props) => {return <Component {...props} data-sln-event="demo: clicked" />}}export function withPricingPlanAttrs(Component): ComponentType {return (props) => {return (<Component{...props}data-sln-event="plan: clicked"data-sln-event-amount="49"data-sln-event-period="monthly"/>)}}
Understanding this code:
- We're creating a function that adds data-sln-event="demo: clicked" attribute to any element it is applied to.
- The part demo: clicked is an event name, and you should replace it with any other event name you want to track.
- You can also pass additional data attributes like data-sln-event-amount or data-sln-event-period to your elements. amount or period are just examples, you can use any other data attribute you need.
- For every different event you want to track, you should create a new function, such as withDemoButtonAttrs or withPricingPlanAttrs, and add it to your elements.
- Apply created functions to your elements.
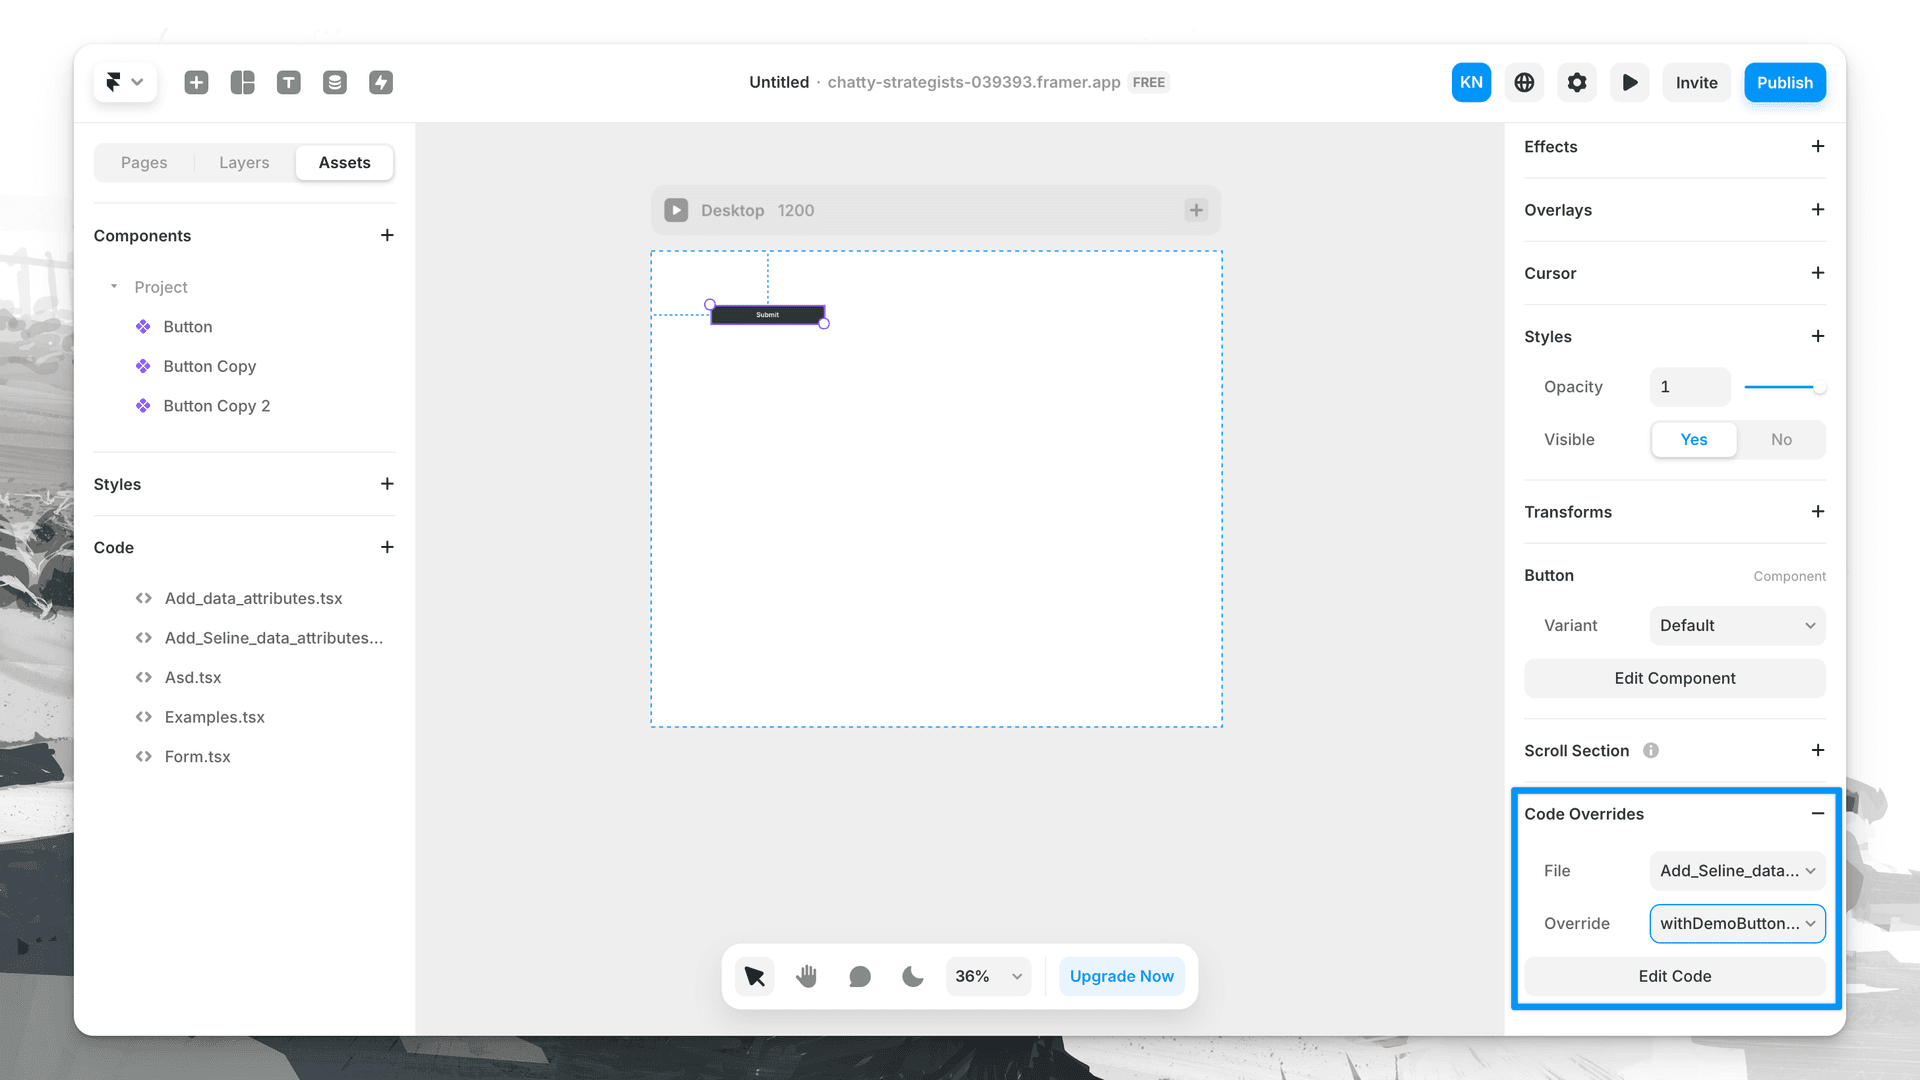
- Save your changes and publish your project.
Now Seline will automatically track any clicks on the button with data-sln-event="demo: clicked" attribute, and you will see these events at your dashboard.